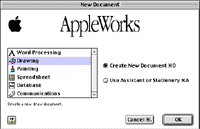
Create a new drawing document in AppleWorks/ClarisWorks and go to File->Save As.. to save it immediately. Remember to save your work every two minutes.
OR
To download an AppleWorks graph paper template in 1/4" scale:
Mac: control-click here and Save.
Windows: right-click here and Save Target
As....
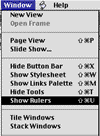
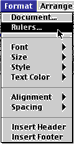
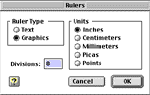
Format Rulers so the Units are either in Inches or Centimeters.
Set the Divisions to correspond to the scale you are using. For example, if you are using 1/4 inch scale, set the divisions to 4. If you are using 1/8 inch scale, set the divisions to 8. If you are using centimeter scale, set the divisions to 10.
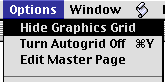
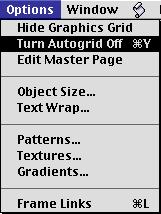
Use the Options menu to Turn Autogrid off. ("Autogrid" makes lines connect - or "snap" - to each other automatically.) This is not recommended for beginners.
Choose the line tool to create walls and windows.
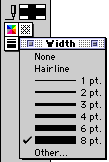
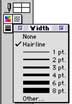
Adjust the width of the line to 8 pt for walls and 3 pt for windows. Remember to draw in scale, using the rulers as guides.
Keep lines straight by holding down the shift key on the keyboard while you draw.

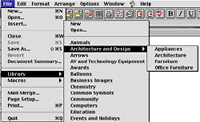
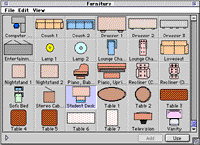
Use the architecture and furniture graphics from the Library to insert doorways, desks, and other goodies into the drawing. (File-> Library-> Architecture and Design-> Architecture, Furniture, Office Furniture) (Note: The Architecture and Design library of clipart is available in AppleWorks 5).
Or, use the drawing and color tools from the tool bar and create your own furniture.